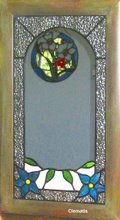
With a relatively quiet week spent sniffling and snuffling with some pesky respiratory ailment- perhaps hay fever (or allergy to this climate) although this is not usually an annual event for me, I have relished the small break. Could be the return of cold weather and lack of rain to clear the air! Just as spring decides to arrive, and we are lulled into believing it is warming up,the temperature plummets to 2 degrees! Not a drop of rain, though, which has the farmers worried yet again as their crops are starting to brown in patches.
One major task during the week was a serious spring clean of the leadlight studio, stripped out, cleaned and rearranged which meant lifting and shifting almost half a tonne of glass and gear and replacing it after undertaking an early Spring Clean. Quite an accomplishment for someone who loathes housework as much as I do! I figure life is too short and it is such a thankless task although I guess it is something we all do regardless! It would be nice if it could be achieved with a wave of a magic wand or a mere flick of a switch! I have discovered muscles I didn't know existed in my body and was more effective than a trip to a gym!
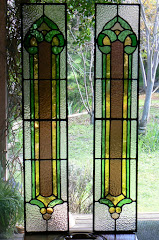
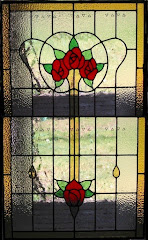
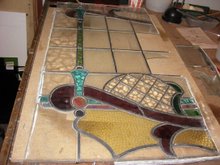
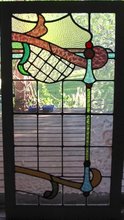
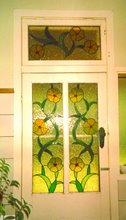
The next task on the books is a door panel, and following that some window panels. After considerable deliberation I have decided to build it in two sections as it will be almost impossible to turn over during soldering due to the weight. The panel is almost 1.6m long by 620mm wide. The existing panel, in rather poor condition, requires replacement with several breaks and becoming unstable as a result of opening and closing ( no reinforcing bars were used). Being made with zinc came , although lighter than lead is less flexible and can often result in glass cracking. I have determined that to create a similar panel will require three reinforcing bars, together with reinforcement on the edges and be made of lead not zinc, however with size - amount of glass and lead making it rather heavy, it needs to be created in two parts and fitted together on installation.
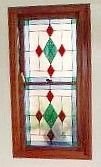
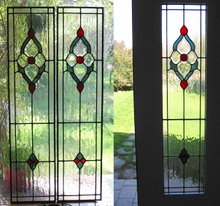
The design is to be geometric- with a focus on hexagons and diamonds.
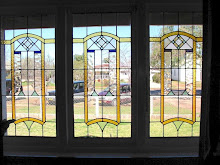
Most leadlights I have constructed have usually been separated by a wooden support with glasswork in the top and /or bottom sections. Some similar ones built and installed in the US are double glazed.
More on this in a week or two as the job progresses!
Saturday, 8 September 2007
Replacing a Broken Leadlight Front Door
Posted by
History
at
9/08/2007 12:38:00 pm
1 comments
![]()
Saturday, 25 August 2007
Study transom for The Upper Hunter Valley
Posted by
History
at
8/25/2007 12:58:00 pm
0
comments
![]()
Saturday, 28 July 2007
Dove for a new Queensland residence
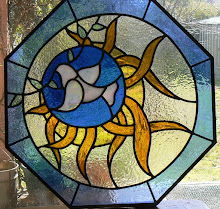
The colours seem to work well, with the blues contrasting the ambers representing the sun.
Originally it was requested the dove be larger however I am somewhat particular regarding how I incorporate birds into leadlight panels as they can look quite ugly if they dominate the space particularly if the panel is relatively small ( less than a metre across) . Hence a simple approach was preferred in keeping the bird smaller as this panel was approximately 400mm across and with border increasing it to 550-600mm. The bird has been created from iridised white streaky glass where the surface of the glass has been treated to create a mottled effect reflecting a shine and flashed appearance with pastel colour change. Amber antique and waterglass was used for the sun.
Drafting birds can pose difficulties not only with regard to feathers but also in creating an artistic finish. I once sighted a galah in a front door sidelight which took up more than half the area and making overall design quite ugly. Since then have erred on the side of caution with regard to incorporating birds when compiling a design and should the space to be filled be quite small, is not really recommended. Unless created using stained glass- where the feathers are painted on and kiln fired prior to leading, which is a separate process, the smaller the design the more limited in cutting shapes to create feathers unless relying on the streaky features in wispy glass and selecting and cutting to best fit sections of the design.
It is reassuring to see a resurgence in the popularity of leadlight in newer homes as it was once viewed as something found in older Federation and Victorian homes, some of which did not suit modern buildings og today, however, with brighter coloured glass, greater contrast in colours, and modern designs, it can be made to look a brilliant feature in modern homes while providing an individual touch.
Posted by
History
at
7/28/2007 01:22:00 pm
2
comments
![]()
Thursday, 19 July 2007
Progress on the Hunter Valley job
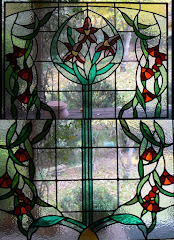
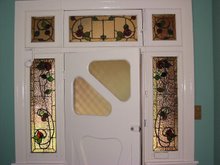
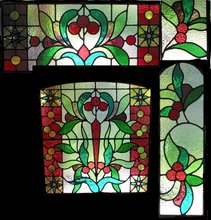
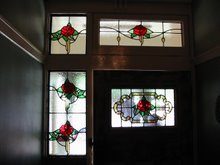
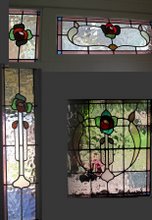
These panels complete the entryway... with a transom, two top sidelights and two arched bottom sidelights. The top sidelights and transom have been capped with a violet arch in the design to compliment the arch in the bottom sidelights and highlight the violet in the flowers. The seagreen ribbon leaves flow up and across the panels linking them together in attempt to create an overall artwork and the sidelights on the right have been reversed to create a mirrored design effect given the symmetrical nature of the seven pieces however the free flowing leaves and slight a symmetrical elements of the designs break with formality. The colours- violet, teal and seagreen, waterglass and amber antique glass compliment each other in texture and colours . The background is Sahara glass. The photo is a composite constructed from the individual pieces to show the completes surround so if not perfectly aligned this is because of my cutting, pasting and stitching!!.
Posted by
History
at
7/19/2007 11:29:00 am
1 comments
![]()
Saturday, 7 July 2007
Hunter Valley Leadlights
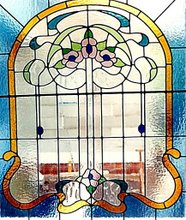
 Transom for Hunter Valley front door surround. Designed by Riverina Leadlight & Fine Art. All works copyright.
Posted by
History
at
7/07/2007 02:24:00 pm
0
comments
![]()
Thursday, 26 April 2007
Riverina Leadlight & Fine Art
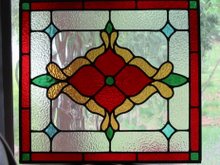
Riverina Leadlight and Fine Art ( riverinaleadlight.com.au) commenced operation in 1988 while I was workinf for the department of education and was asked to fix a couple of broken panels. We provide a range of authentic leadlight panels, mirrors, artworks, insurance repairs, restoration and leadlight supplies for hobbyists throughout the Riverina, NSW and North Eastern Victoria.
We also repair windows for clients in metroplitan, regional and rural areas.
The leadlights are a quality product made from glass pieces cut and fitted together to specification to create a design for a window, door mirror or artwork and each piece is created to individual taste and size to fit.
Leadlight adds colour and sparkle to both older style and newer homes and designs can be made to suit with either traditional style or more contemporary.
The designs are drawn specifically to suit the measurement and balance the space to be filled. The pieces of coloured glass are then cut and fitted together in the traditional way using lengths of lead and soldered to create a finished which can be fitted into a frame. The panel is waterproofed and cleaned prior to fitting and made in keeping with safety standards.
Along with leadlight, we produce artworks in a range of media such as watercolour, oil and acrylic.
We hope you enjoy viewing some of the works we have created.
All works are copyright.
Posted by
History
at
4/26/2007 01:28:00 pm
0
comments
![]()
Labels: artworks, doors, glass, Leadlight, leadlight repairs, mirrors, paintings, windows
TESTIMONIALS
*Many thanks for your hard work. The leadlighting is a great addition to the overall impression of the house.
Prue -Hunter Valley Jan 2009
* Nola said " Oh Yes, one very thrilled recipient here! Jan 26 2008
* Prue & Dennis: Hunter Valley : Dennis and I are thrilled with the work you have done on the leadlights. It has made our home come alive !!! Your expertise has restored the entrance hall and the front bedroom to how I imagine they must have looked when the house was built in the 1890s - albeit, with a different design. Many people have been "blown away" with the effect of your excellent work and are especially interested to know that you created it all, long-distance - from Lockhart in the Riverina - via telephone calls, emails and our very careful measurements ! Thank you for the time taken, on our behalf, to research the best methods of transporting our beautiful porthole leadlight to the Hunter Valley . Thank you too, to Les who assisted you by making up the sturdy crate in which the leadlight was transported. You are both very talented people and I intend, in a few months time, to commission Les to paint a picture of our restored house. We will be in touch again to have the remaining transom designed for the back door, when work has been completed in the kitchen. Many thanks for your delightful friendliness, customer-support and speedy completion of our superb new addition to our "work-in-progress".Prue and Dennis
* Monday, October 01, 2007
Anne Muir said...
Hi, I am the person who commissioned this beautiful hexagonal window from RL. I was after a dove of peace and although I had something in mind, I could not really describe what I wanted . RL came back with a few ideas and after a few changes we ended up with the above. I am absolutely thrilled with it and can't wait to see it installed in our new home which is currently under construction. I will send a picture to RL once we are in the house. I am extremely happy with RLs work and all her help with colours and textures etc.. I would definitely recommend Riverina Leadlight to anyone interested in adding something different and beautiful to their home.
Nola said...
* Love the new work, as I'm sure the new owners will too. It must be frustrating to encounter other people's poor workmanship. I know that fixing things done wrong first time around is not easy or pleasant work! Or cheap, for the owner!
Maryann 'n Steve said...
Thanks to RL we are now the very proud owners of some absolutely gorgeous waterbirds. We cannot express how happy we are with every aspect of our interactions with RL , from the initial consultation, through the whole design and consultation process, to viewing the work in progress and now the finished product. This is a very special addition to our backyard (yes, we are a little eccentric...most people put their leadlight in the house!). Riverina Leadlight have our recommendation to anyone looking for something different, created by someone who listens to your ideas, and produces a truly unique masterpiece. We are ecstatic!!Thanks Glen.....we will be back!
What is leadlight?
How is a leadlight made?
1. A design is created anda pattern drawn.
2. The glass pieces are cut to shape from the pattern
3 The pieces are fitted together like a jigsaw with the pieces separated by strips of H shaped lead to complete the design .
4 The joins are soldered to form a solid panel the correct size to fit a frame, window or door space.
(External or large internal panels such as doors and windows are reinforced for added strength and puttied and polished after construction to protect against the weather.)
5. The leadlight is puttied, cleaned and polished to blacken the lead
6 The leadlight is installed just as a pane of glass would be installed in a window frame.
The majority of our designs are unique and made to specification and we are able to create designs to suit a range of situations whether modern style, or Edwardian and Victorian.
Copperfoil products, also available, are not leadlight as they are not made using the same process, and therefore have limited applications such as lamps, small mirrors and light catchers.
Where leadlight be displayed in my home?
Modern designs can be created to suit 21st Century homes and should a permanent fixture not be possible, free hanging pieces are available.
In older homes, transoms above doors were often leadlighted allowing both light and air to pass between rooms. These panels were often hinged to allow warm air to flow between the rooms or to the outside on hot days, allowing cooler air to take its place. Fan shaped leadlights or " fanlights" also added colour and light to internal hallways.
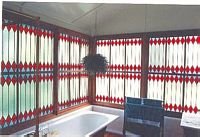
A timber surround is preferred to allow flexibility of movement and to minimise expansion. Leadlight can be installed anywhere either internally or externally, however external panels require weather proofing and in some cased reinforcement. Porthole windows are a popular addition to some homes today and leadlights provide privacy as an alternative to plain glass or block excessive glare from the sun.
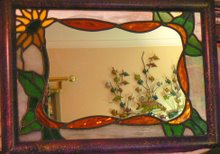
An addition to any bathroom or hallway can be a leadlight mirror with decorative design, framed or unframed to be hung or afixed to the wall. Cabinet and cupboard doors are another alternative in wall units or free standing cabinets. Brightly coloured mirror glass can be used to create artworks where backlighting is minimal, however lighting from behind can be fitted if desired.
Would I be able to make or repair a leadlight?
Many people undertake leadlight courses for various reasons , some with a view to learning a new skill, to create lamps and hangings, or make panels for their homes. It is important, however, to keep in focus as with any project, just what is involved in creating a piece, prior to commencement as this can often allay anguish and also unnecessary expense. While creating a light catcher can be a relatively simple and straight forward process, building a door panel or window pane can be a very different issue . Constructing a toolbox is largely different from building a house or a new kitchen and leadlight is a complex task!
I have had many people ask if I conduct classes as they wish to create a window or sidelight for their home with view to it being a cost saver. However, a half a dozen woodwork classes does not a back deck build and with door and window panels consideration must be given to a range of factors such as durability and stability, and waterproofing.
Unfortunately due to the issues of liability & safety, coupled with work space and cost factors I do not conduct leadlight classes however they are available through incorporated institutions such as TAFE.
Developing the basics of cutting and fitting pieces of glass together to create a panel or lamp the correct size takes some time and before committing funds to tools and materials it is wise, if considering DYI a cheaper option, to set realistic goals, to consider the reasons for embarking on a course and to research what is required to gain the desired result. After all, the last thing anyone would want is to considerable money spent on materials, course and tools to create a window only to find it sags and requires expert input to rectify the problem within a couple of years. ( Point in case being the case with a particular church window in the ACT designed and constructed all but a few years ago by someone claiming to be a leadlighter only to show signs of serious sagging and requiring attention. )
Leadlight courses include many facets ranging from craft like activities - copper foiling, lamp making, light catchers (which can be hung in front of windows )and smaller leadlight panels such as cabinets to trade based larger projects. It can require time and experience to reach the stage of knowledge of structures and construction techniques.
SO WHAT IS COPPERFOIL? Copperfoil is made by placing foil strips over the edge of the glass, piecing the glass design together by placing the pieces side by side and soldering over the entire foil strip. While it is light and suitable for lamps and smaller light catchers, it is far less flexible than leadlight as the H lead used in leadlight acts as a cushioning agent absorbing vibration during movement. ( e.g. caused by ground or air) Copperfoil panels are more rigid being separated by a paper thin strip of foil and consequently will often crack under the stress of movement and vibration-constant opening and closing - internal pressure created by air movement or ground movement resulting from traffic, climate and other factors.
It is important to consider the building standards regarding different situations of panels, depending on height, size, and placement whether in a bathroom, a wall, on a landing; internal or external and those not engaged in professional leadlight trade should check structural issues prior to embarking on a major project as some panels require reinforcement and support given the weight and location of the panel. Leadlight is very heavy and given a square metre of glass minus lead can weigh up to 7 kilos, a leadlight panel of same size can weight considerably more.
Leadlight is definitely should be viewed a trade rather than a hobby and professional leadlighters contacted regarding products and courses to ensure theyare experienced and /or a registered business.
Can leadlight be fitted into aluminium windows?
Timber windows do lend themselves far better to leadlight, and while the remaining windows in a home may be aluminium, it is possible to insert a timber frame in areas such as bathrooms to accommodate a leadlight.
How can I tell the condition of my leadlight?
Leadlight if in good condition should be quite solid and strong. They can last many decades, even centuries depending on the degree of care. Sometimes if subjected to movement or impact, the leadlight may become loose and the lead may not support the glass sufficiently if the joints are poorly soldered. Lead which has been exposed to chemicals can resulted in oxidation and glass can become sandblasted over time in dry and dusty areas or if in a smoky or smoggy area. If subjected to continual movement and not reinforced, depending on how the leadlight was made, solder joints can fracture, putty from under the lead break away and cracks appear in the glass. In some cases, if subjected to stress, glass can develop hairline fractures almost naked to the human eye until the leadlight is dismantled or removed. However a well made leadlight should last for many years.
More often than not the leadlight can be repaired or restored if the glass is cracked or broken however if the leadlight has been poorly made, has gaps between the glass and the lead, is sandblasted or is allowing dust, drafts or water through gaps and if there is no other matching leadlight it may be more cost efficient to have a quality leadlight replacement build to same , similar or new design.
To determine the condition, tap gently with the hand or fingers and press with the hand on the leadlight pane. If it flexes more than the usual small amount (leadlight is meant to flex a little in order to withstand movement and air pressure), or if it rattles then it is in need of repair.
Placing sticky tape or contact over the leadlight is not a good idea unless a temporary screen to dust or rain and in this event if necessary, some masking tape and a small piece of heavy duty plastic is a far better alternative temporary measure until the leadlight can be repaired.
Leadlight is usually quite tough and solid if in good condition and well made. Solder joints and lead should be free of fine cracks. Glass which has cracked ( sometimes hairline and almost invisible to the naked eye) or broken should be replaced as over time the leadlight may weaken and is more difficult to salvage. If the glass is generally in good condition the lead can be replaced and re soldered requiring a REBUILD or RESTORE. Pieces of broken glass can often be matched and or replaced which is a REPAIR.
Should gaps can appear between the lead and the glass, it may require a complete re-seating into the lead or glass recut as poor cutting can result in the glass not seating into the lead came neatly. Some leadlight I have repaired or restored have contained glass which has been very poorly or roughly cut creating gaps between the glass and lead.
WHAT CAN BE DONE IF LEADLIGHTS ARE IN NEED OF REPAIR AND I AM SITUATED IN AN ISOLATED AREA?
For those living in isolated country areas who have leadlight in need of repair, leadlight panels can be removed by removing beading or putty using a chisel or sharp object. Before removing- photograph and measure the opening. When removing, if the leadlight is lacking in strength it can be placed or taped / strapped onto a board . The leadlight can be packaged in wooden panelling and transported to us for repair. If less than metre in length, Australia Post provides good service for a reasonable rate. We can repair the leadlight and return it within a few days depending upon our workload, however we endeavour to carry out emergency repairs to panels as quickly as possible. It also necessary to provide an exact measurement of the space from which the leadlight was removed ( to the nearest Millimetre, plus a photo of the design in case of total collapse! Then a new design cam be created to suit the existing pieces and measurements.
In the interim, the window space can be filled temporarily with a board such as MDF cut to size by a carpenter or builder or owner if a handy person and leadlights are not overly difficult to install as they are in one piece similar to what a panel of glass would be ( and equivalent in size).
On reinserting panels, glaziers points can be used then some putty or a non corrosive silicon applied to the outside after installation and trim or strips of putty being reapplied if necessary.
Leadlights and stained glass panels are relatively simple to install and the panel is a solid one piece which can be placed in situ given it is built to fit the precise space with a couple of millimetres to allow for movement. The surrounding lead should NEVER have nails or tacks placed through it as this can cause the leadlight to twist in event of movement resulting in cracking and warping. Where leadlight is installed by clients or tradesmen, we are more than happy to provide assistance or advice to make the process and simple as possible and to ensure the leadlight will provide pleasure or enjoyment for many years to come.
For all enquiries
or for more information you can visit:
http://www.riverinaleadlight.com.au/
Repairs and Restorations
Leadlight panels, if old and subjected to movement or stresses over years may require re-puttying if the old cement has turned powdery and the leadlight rattles. Over time, some cements can deteriorate allowing moisture and air to pass between the glass and the lead. The putty falls away as a fine dust. Excessive stress or movement may cause fine cracks to appear in the lead, glass or solder joints. If the joints and lead are in good condition, the leadlight may just require re-cementing.
If the lead has deteriorated, the leadlight may be taken apart glass removed, cleaned and rebuilt with broken sections replaced with new glass and lead if required.
If the leadlight is in poor condition, there are no other matching pieces, does not have historical significance or has been poorly made, a new replacement may be a more financially viable option. By retaining the old design and closely matching colours and textures an almost identical leadlight can be created in keeping with the original design. Some pieces of unique glass from the original leadlight may also be retained and reused and background replaced, depending upon the quality of the leadlight. If pieces have been badly cut or fitted, they may need reformatting.





.jpg)


